Squired allows you to set the hours when you want to accept, and not accept bookings. To set your available hours, follow the steps below. 

  1. Click on My Bookings under your User dropdown at the top right
  2. Navigate to Working Hours under the Bookings tab
  3. Click on your username under List For and click Show
  4. A schedule will then display for your working hours. Hours highlighted in Blue are set to accept bookings, while those greyed out are not available for students to book. 
 

Set Up Google Calendar

Connecting your account to Google Calendar syncs your schedule from Google to Squired, automatically blocking out times where you have events on Google Calendar for booking.

Your connected Google account also automatically creates a Google Meet for your video sessions with students. To connect your Google account, use this link and follow the instructions provided. 

Step by Step Google Calendar Setup

  1. Set your Google Calendar synchronization method. Once you’ve selected Synchronization, click Save Settings at the bottom of the page.


  2. Click Authorize and you’ll be taken to the Google Calendar authorization page. 


  3. Log In to your Google account. Once you’ve logged in and authorized the connection to Squired, you’ll be taken back to your Google Calendar setup page. 


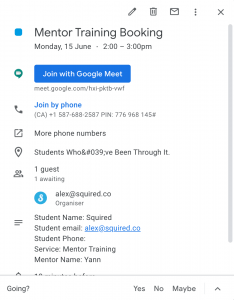
  4. Once your Google Calendar is connected, select which Calendar you want to save your bookings to. If you don’t select a Calendar, it will default to the primary Calendar on your Google account. 
Published in Help Docs, Squired

Get Help

If you have any trouble or questions, contact our Mentor Support team and we’ll help guide you through the process.